-
Swift WKWebView 양방향 통신iOS/개념정리 2024. 6. 11. 15:31
apple에서 제공해주는 WKWebView라는 WebView가 있습니다.
원하는 url를 load 할 수 있고, 아니면 직접 html String을 load할 수 있습니다.
SFSafriViewController라는 것을 사용해서 만들 수 있지만 WKWebView가 좀 더 Custom하기 용이하다구 생각합니다.
iOS 8.0 부터 생겼고, WebKit을 import해서 사용하면 됩니다.
프로젝트에 들어가면 온전한 native소스가 아닌 webView와 같이 사용하는경우가 많습니다.
거기서 참고할 만한 간단하게 WebView -> Native랑 Native -> WebView를 알아보겠습니다.
우선 htmlString을 사용하여 간단하게 웹뷰를 구성하고 그 구성한것들을 이용하여 통신 해보겠습니다.화면 구성
다음과 같이 WKWebView를 만들어 줍니다.
lazy var webView: WKWebView = {
let controller = WKUserContentController()
//htmlString에서 webkitMessage handler 등록된 이벤트를 사용하여 발생시 UserContentController로 들어옴.
controller.add(self, name: "btnClick")
let config = WKWebViewConfiguration()
config.userContentController = controller
let tempWebView = WKWebView(frame: .zero, configuration: config)
tempWebView.uiDelegate = self
tempWebView.navigationDelegate = self
tempWebView.loadHTMLString(htmlString, baseURL: nil)
return tempWebView
}()
다음 네이티브의 버튼을 만들어 줍니다.
lazy var sendToWebViewButton: UIButton = {
let tempBtn = UIButton()
tempBtn.setTitle("send to webView", for: .normal)
tempBtn.backgroundColor = .red
tempBtn.addTarget(self, action: #selector(sendToWebViewAction), for: .touchUpInside)
tempBtn.frame = CGRect(x: (UIScreen.main.bounds.width / 2) - 90, y: (UIScreen.main.bounds.height / 2) - 25, width: 180, height: 50)
tempBtn.layer.cornerRadius = 10
return tempBtn
}()
다음 load할 html String을 만들어 줍니다.
fileprivate let htmlString = """
<!DOCTYPE html>
<meta content="width=device-width,user- scalable=no" name="viewport">
<html>
<body>
<p> WebView </p>
<button onclick="sendScriptMessage()">
native로 보내기!
</button>
<div id="recieveAction">Hello World</div>
<script>
function sendScriptMessage() {
window.webkit.messageHandlers.btnClick.postMessage('안녕')
}
function recieveActionFromNative(){
const content = document.getElementById('recieveAction')
content.innerHTML = '<span style = "color: red;"> recieveAction </span>'
}
</script>
</body>
</html>
"""
그리고 viewdidLoad에 만들어둔 위의 것들을 화면에 표시 해 줍니다.
override func viewDidLoad() {
super.viewDidLoad()
self.view.addSubview(webView)
webView.translatesAutoresizingMaskIntoConstraints = false
view.addConstraints([
webView.topAnchor.constraint(equalTo: view.topAnchor),
webView.bottomAnchor.constraint(equalTo: view.bottomAnchor),
webView.leadingAnchor.constraint(equalTo: view.leadingAnchor),
webView.trailingAnchor.constraint(equalTo: view.trailingAnchor)
])
webView.addSubview(sendToWebViewButton)
}

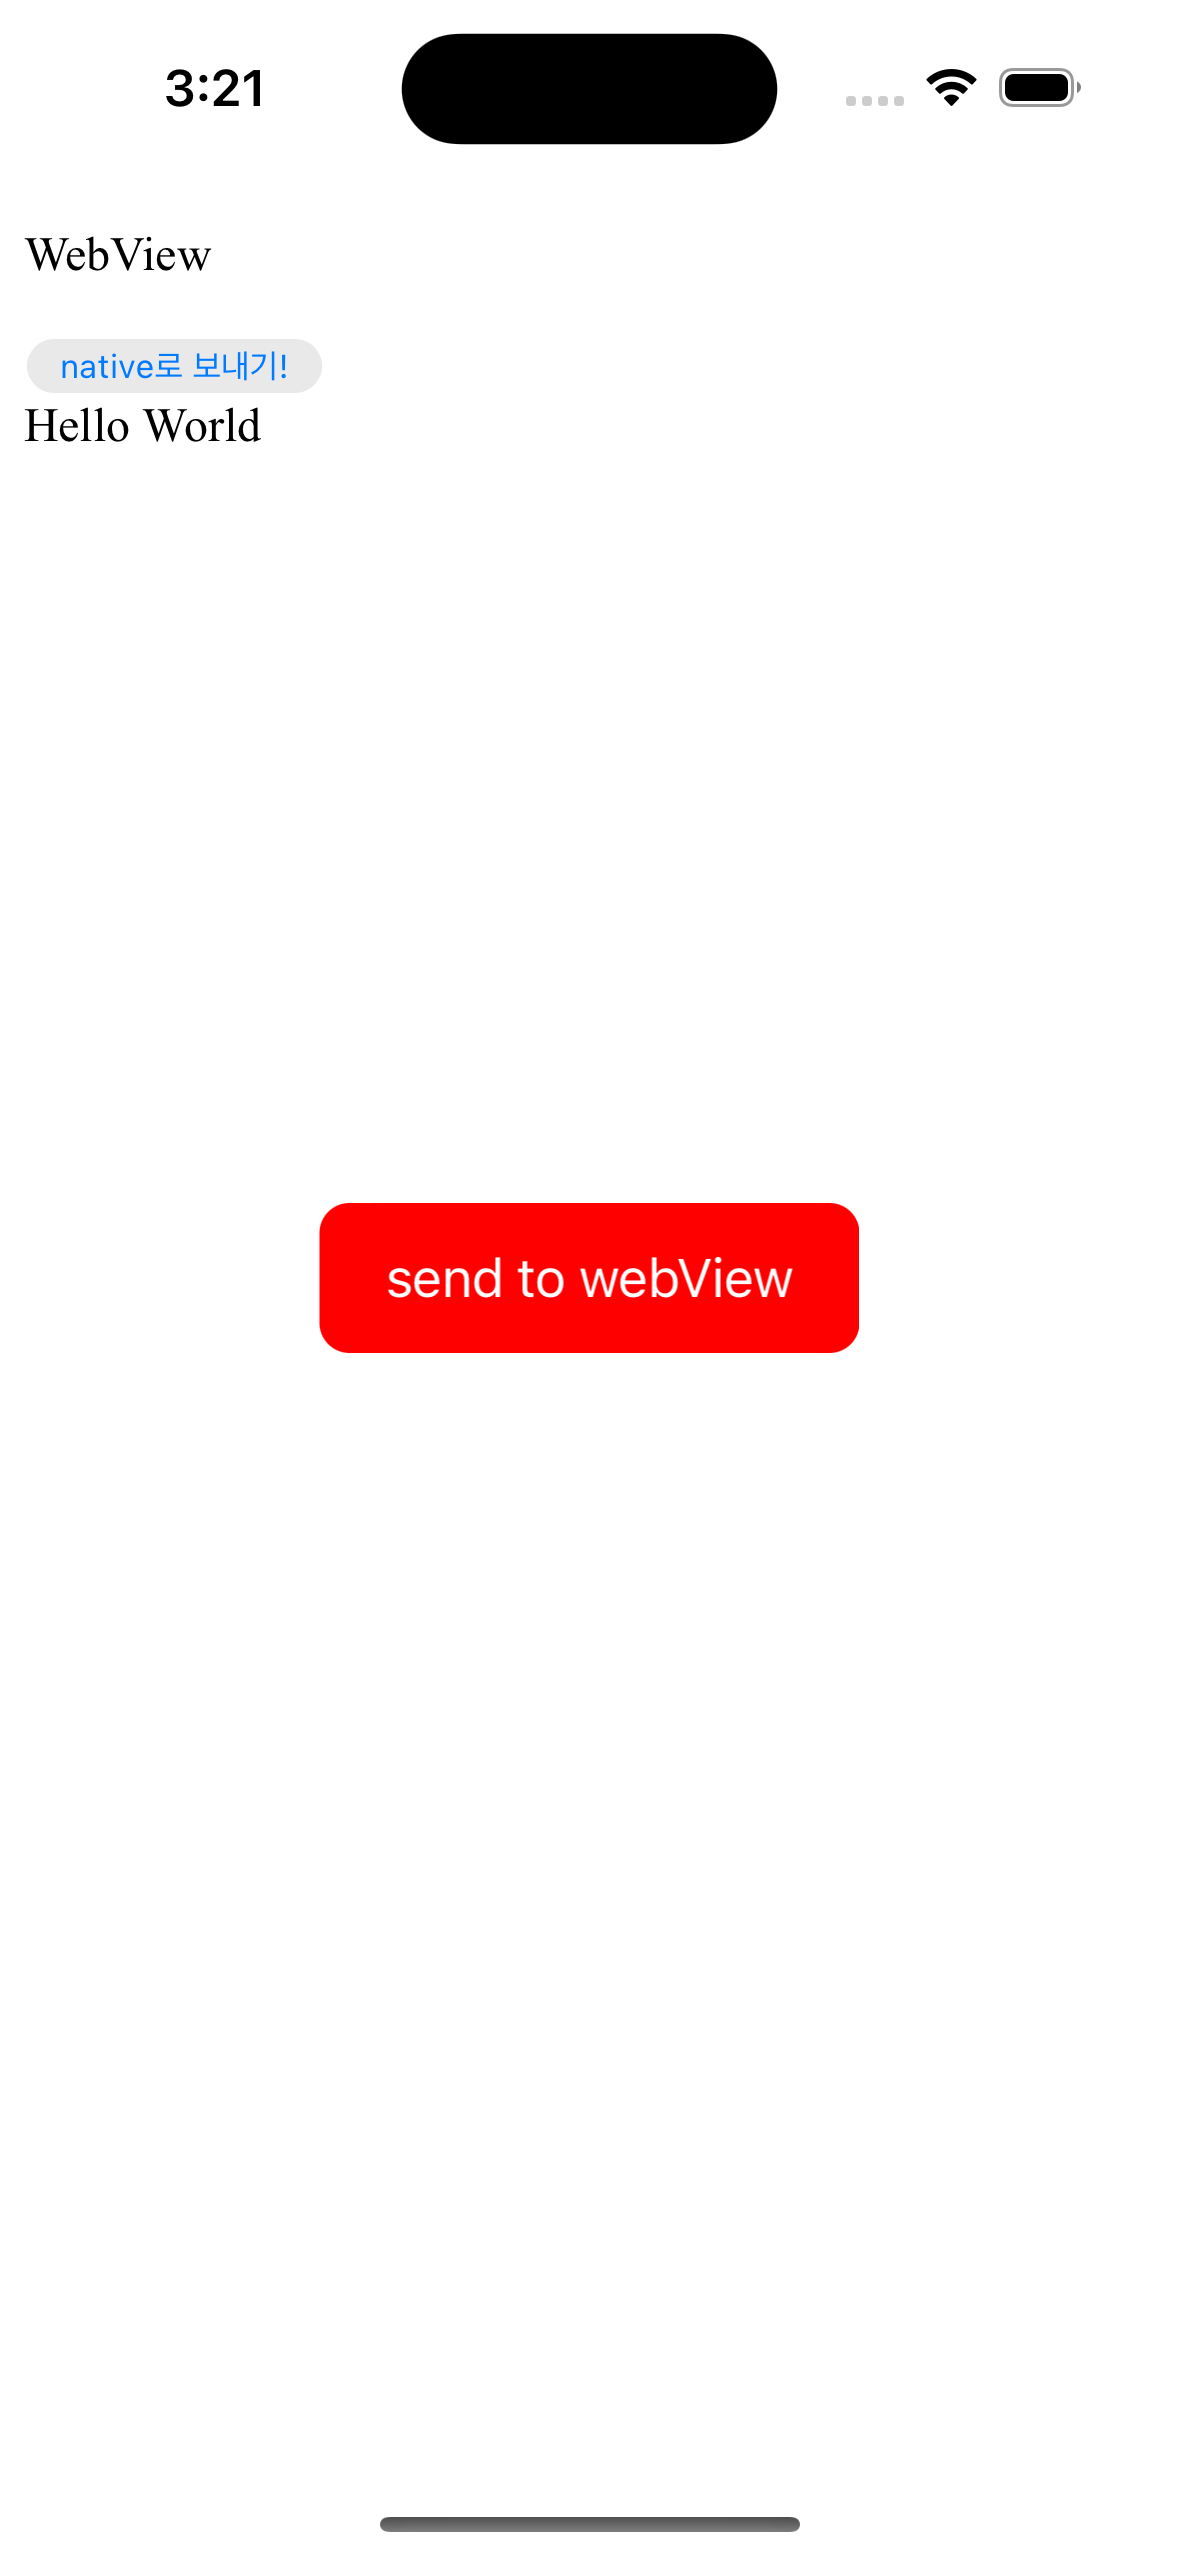
UI 구성 그러면 위와 같이 화면이 만들어 집니다.
빨간 버튼은은 Native 버튼이고 나머지는 상단의 부분은 WebView입니다.
WkWebView -> Native
위에서 보면 WkWebView를 구성할때 WKUserContentController에 add하여 이벤트를 등록해 줬습니다.

이렇게 등록된 이벤트는 WebKit에 Message Handler를 통해서
// Web -> Native로 들어오는 지점
func userContentController(_ userContentController: WKUserContentController, didReceive message: WKScriptMessage) {
print("message: \(message.name)")
}
위 함수를 통해 들어옵니다. 그래서 저 버튼을 누르면 "message: btnClick" 이런 메세지가 로그에 찍힙니다.
Native -> WkWebView
이제 네이티브에서 WKWebView를 건드려 볼겁니다.위에서 네이티브 버튼을 만들때 등록한 타겟을 보면

위처럼 sendToWebViewAction이 있습니다 이 함수를 만들어 볼겁니다.
// Native -> Web (javascript에 recieveACtionFromNative() 실행)
@objc func sendToWebViewAction(){
webView.evaluateJavaScript("window.recieveActionFromNative()")
}
이런식으로 하면 webView에 load되어있는 recieveActionFromNative 이게 실행되어서 글자가 빨간색으로 변하면서 글자 내용이
recieveAction 이렇게 변하게 될겁니다.

감사합니다.
'iOS > 개념정리' 카테고리의 다른 글
[iOS] Alamofire + Combine with Clean Architecture (0) 2024.01.29 <Swift>Combine(2) 사용하기 (0) 2023.03.15 <Swift> Combine(1) 사용하기 (0) 2023.03.03 <Swift>Skeleton 사용하기 (0) 2022.10.31 <Swift> Kingfisher 사용하기 (0) 2022.10.14